Introduction
Hosting a static site can sometimes be overwhelming.
You could purchase a service from a hosting provider, but they are usually intermediaries for services that you can get from cloud providers like AWS, google cloud, Azure, Linode, etc. Not that they do not have a place. I personally used HostGator to build a site for one of my friend’s father’s business. We installed WordPress with their very helpful one click installs, and got right to it. After all, there is a reason why…
There are currently over 455 million sites that use WordPress.
But what if you don’t have/want a wordpress site?
Perhaps you are on a tight budget, and if you were running wordpress on your resource-scarce webserver, your page load times would suffer. A high page load time is usually correlated with higher bounce rates and especially if you are starting out, you need all the help you can get.
Here I will show you how you can host your static site using Linode Object Storage.
You can use object storage to host and serve your site for as little as 5$ a month. And you won’t need to configure any HTTP server software (like NGINX or Apache) as you would if you were hosting your site on a hosted computer like on AWS, Linode or any other provider.
What Is Linode Object Storage?
Object storage treats data as objects. Unlike file systems, they do not have a file hierarchy.
It has several benefits for the use case of running a website over conventional file systems. You can read more about that here.
This tutorial assumes you have a site you want to host. I will build a sample Jekyll site to demonstrate how to build and deploy a static site to object storage.
You could also use something like Hugo, next.js or Gatsby to build and deploy your site.
Setup
Credit to the folks at Linode for their great documentation. If you want you can follow their tutorial on how to set this up, mine covers some extra things I had to perform to get this up and running.
Sign up for an account at Linode. You can find referral links that give you 100$ free credit for 2 months from some tech creators on YouTube (I do not have a link for you yet!).
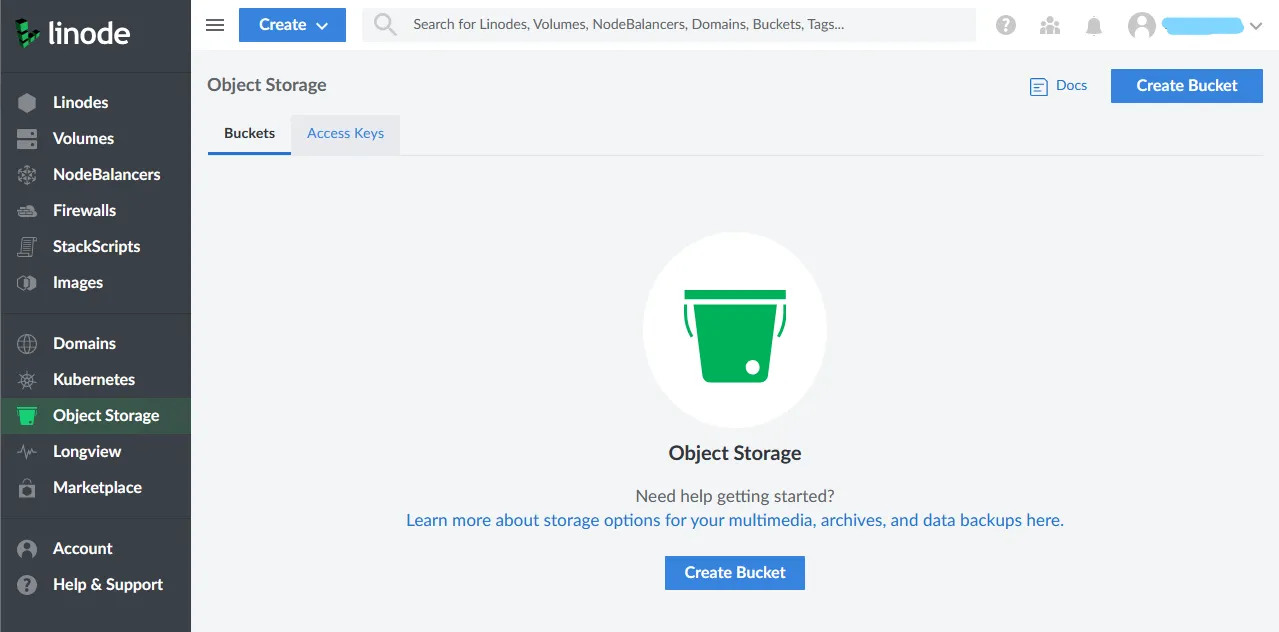
On your dashboard, navigate to “Object Storage” on the left side pane.
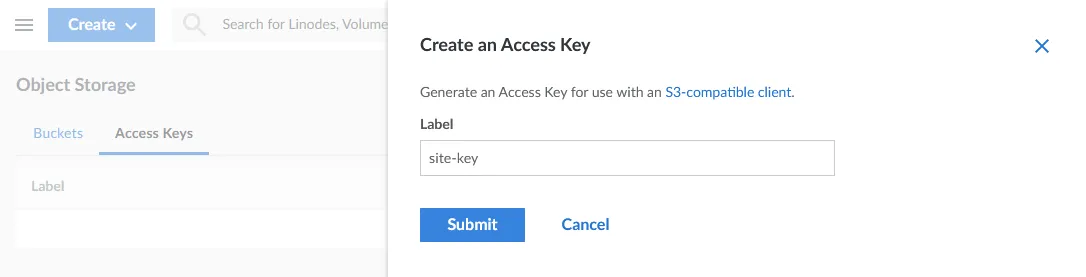
Click on “Access Keys” and “Create Access Key”.

Give the key a label and Submit.
Now it will prompt you to confirm. As mentioned before, object storage starts at 5$/month. This includes (at the time of writing) 250GB of storage and 1TB of data transfer. If you are okay with the costs (or have some of that sweet referral money), click “Enable Object Storage”.
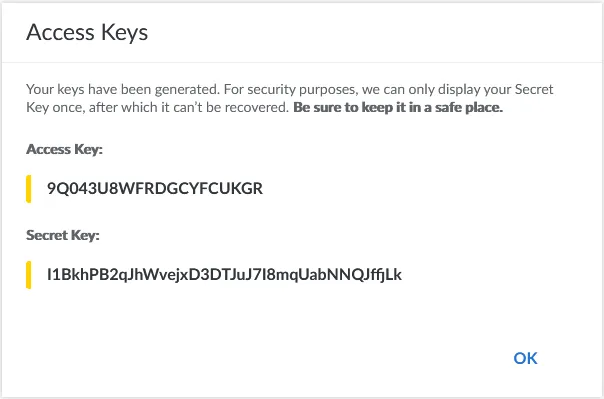
Now your keys will be displayed. Store them in a safe place and don’t lose them!
Once you are done with that, you can move on to creating the bucket.
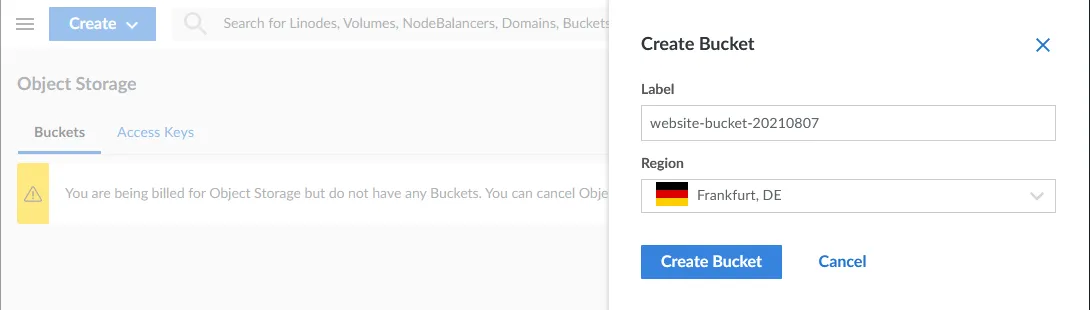
Go back to the buckets tab (next to the access keys tab) and click on “Create Bucket”.
You will now see 2 fields. You need to give your bucket a name and select a region. The bucket name has to be unique inside the region you have selected. Once you have chosen a label and a region, click on “Create Bucket”.
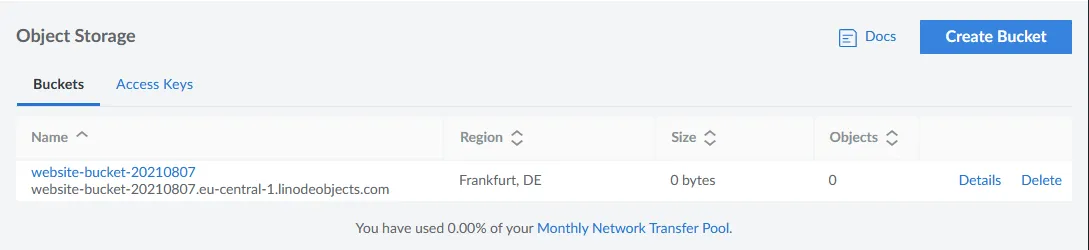
If all goes well, you should now have created the bucket and it should show on your screen something like this:
Now we can move on to building a demo Jekyll site.
Building the site
As mentioned, you could use many different site generators (next.js, Hugo, Gatsby, etc), but in this example I will generate a Jekyll site.
I have the dependencies for Jekyll installed on my computer, you can find the install instructions here.
Once the dependencies have been installed, create a website called test.
jekyll new test
Then change into the generated directory and build the site:
cd test && bundle exec jekyll build
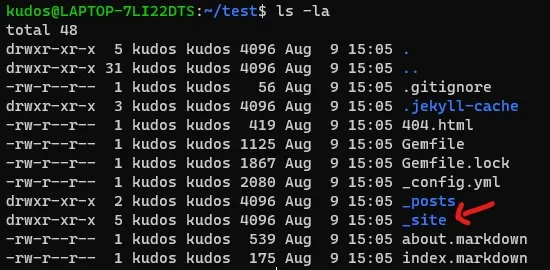
Done! This will generate a _site directory, which is where your generated website files are located. These are the files that we will be uploading to the server.
If you want to serve the site on localhost, then while still in the test directory, run the following:
bundle exec jekyll serve
This will serve your site on http://127.0.0.1:4000 (localhost port 4000).
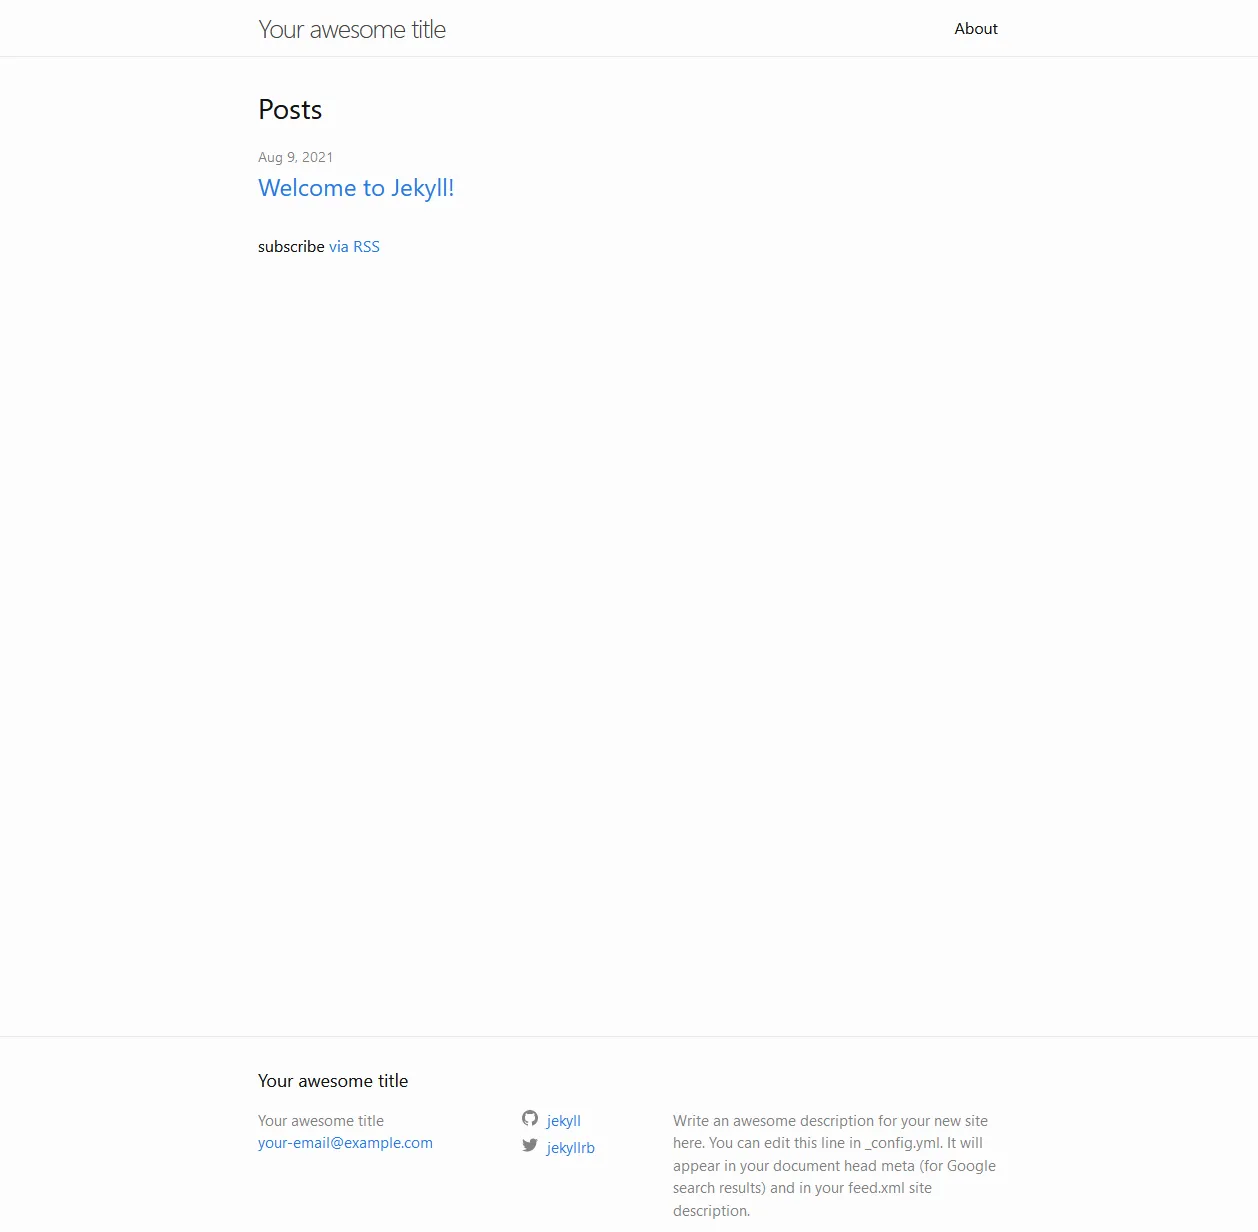
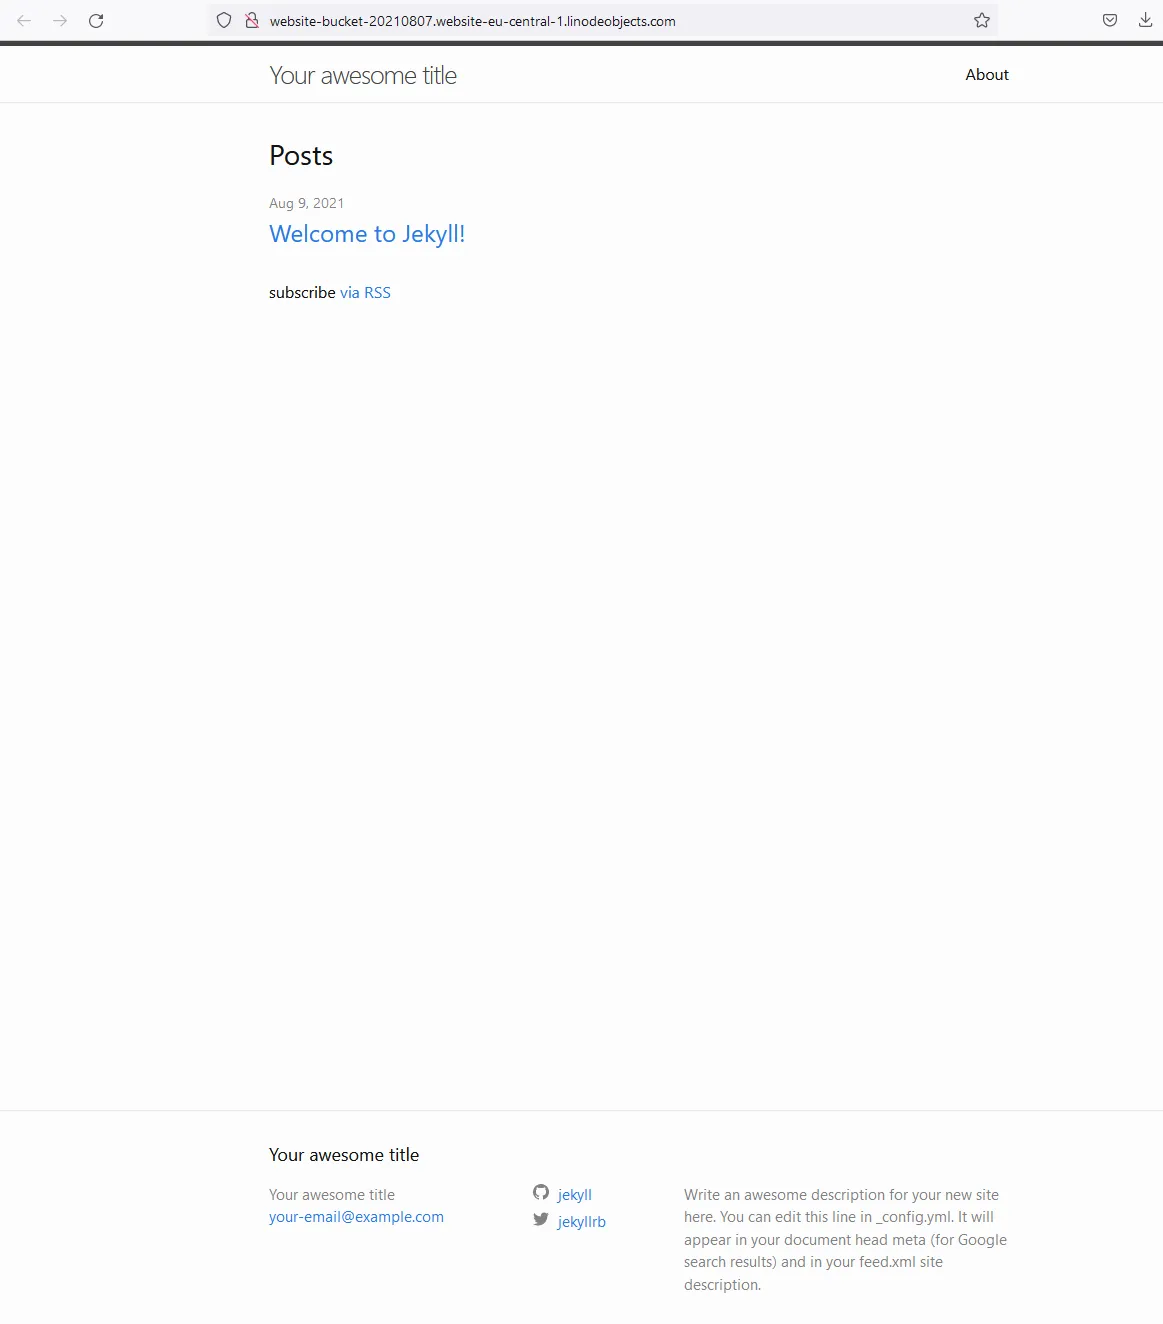
By default it will look something like this:
Installing s3cmd
In order to communicate with the bucket through the command line, you will need to install the s3cmd tool.
To install s3cmd, you need a system that has pip installed. The install depends on what OS you are running, but for Debian based Linux, you can run:
sudo apt install pip
You can install pip on Windows and MacOS as well. The official pip package documentation can be found here.
With pip installed, install s3cmd with the following command:
sudo pip install s3cmd
More details on the tool and more detailed install instructions can be found on their github page.
Configuring s3cmd
In order to be able to connect to your bucket, manage and upload files, you will need to configure s3cmd with your access keys.
First run the following command:
s3cmd --configure
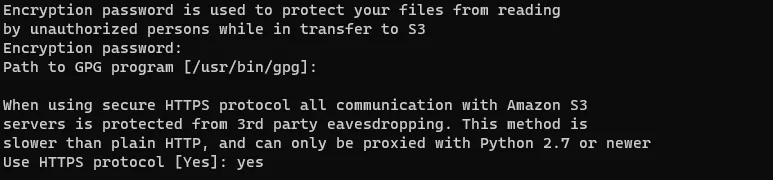
Now you will be prompted to enter your access key, the prompt should look something like this:

Enter your “Access Key” first and hit enter. You will then be prompted to type the secret key.

After that you will be prompted for the region. DO NOT change it, even if your region is different, just hit enter.
When prompted for the endpoint, type [cluster-id].linodeobjects.com where [cluster-id] corresponds to the region your bucket is in from the following list:
- Newark:
us-east-1 - Frankfurt:
eu-central-1 - Singapore:
ap-south-1
In my case it would be eu-central-1.linodeobjects.com.

For the DNS-style template, enter the following:
%(bucket)s.[cluster-id].linodeobjects.com
Only changing [cluster-id] as you did before. In my case, it would be:
%(bucket)s.eu-central-1.linodeobjects.com

Now optionally you can type in an encryption password. I would leave this blank for the purposes of hosting a website on the bucket. Use this if you intend to store encrypted files on the bucket itself. Regardless, the connection to the bucket will already be encrypted since we will configure the Use HTTPS protocol as yes.
Hit enter when prompted for the GPG Program, leaving it blank.
Type yes and hit enter when prompted to Use HTTPS protocol.
Leave the rest of the options blank and type n when prompted to test with supplied credentials. We will not test it now since we have to make additional modifications. Type y when prompted to save settings and hit enter. Take note of the configuration file since you will need to add to it later.

NOTE: In some cases, s3cmd does not require the next step to be performed, but in my case it was necessary. If you want to know if your configuration is working at this point, type s3cmd ls. If your buckets are displayed, you can skip the next step. If not, and you get n error like 403 (SignatureDoesNotMatch), proceed with the next step.
Generating a Personal Access Token
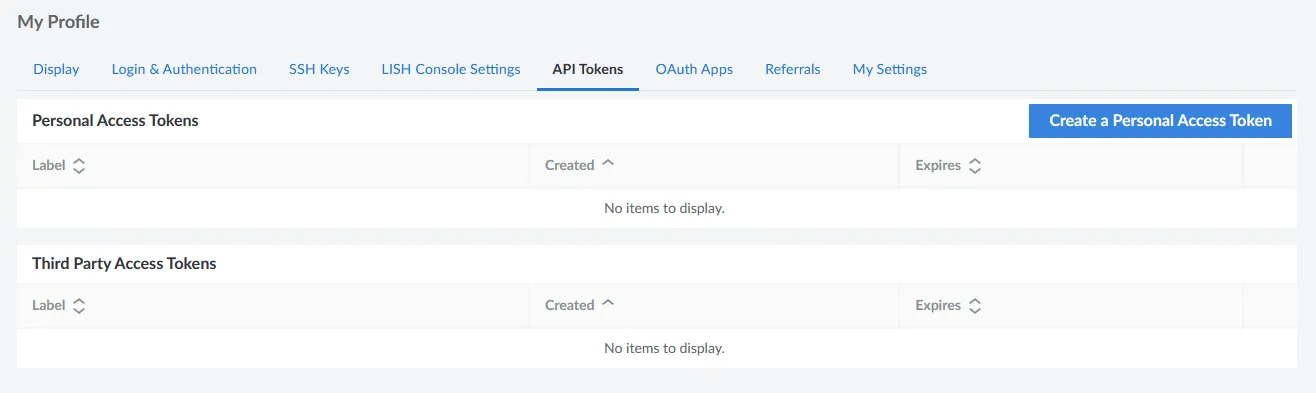
Now you will generate a personal access token. Go to your profile on the Linode dashboard and select “API Tokens”.
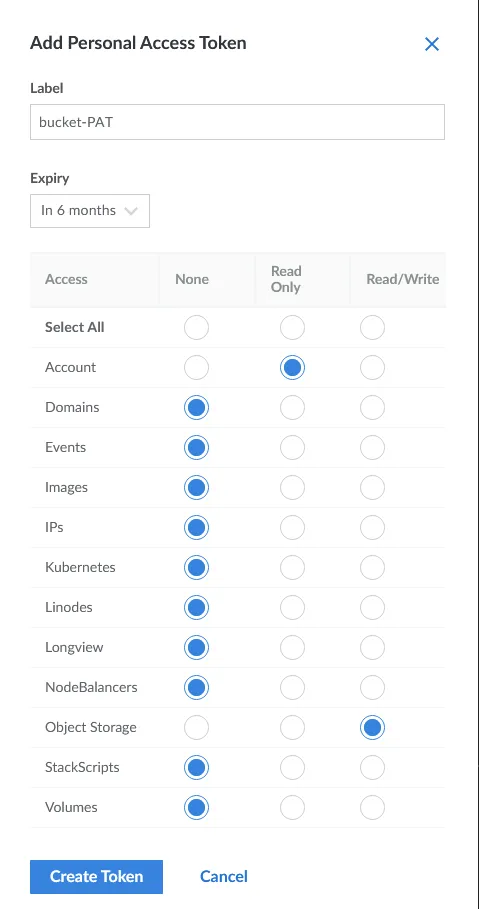
Click on “Create a Personal Access Token”. Now you can give it a name. As for expiry, you can leave the default. For the permissions, select read only for account and read/write for object storage. Leave the rest as is.
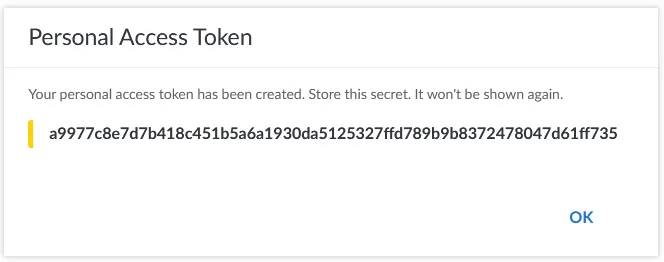
Then click on create token. Your token will now be displayed. Copy it and keep it in a safe place!
Now add it to the s3cmd config file from before, with sudo nano /path/to/config, where /path/to/config is the s3cmd config file, in my case the full command would be sudo nano /home/kudos/.s3cfg
Once open, locate the access_token row and paste your PAT after the equal, it should look something like this:

Save and exit with ctrl+x followed by y and enter.
Test s3cmd by typing:
s3cmd ls
If you see your buckets listed, it is working!

Uploading the files to the bucket
Now we can set up the bucket to serve a website and upload the site files.
Run the following to configure the bucket as a site, and indicate the index and error files.
s3cmd ws-create --ws-index=index.html --ws-error=404.html s3://[BUCKET]
Where [BUCKET] is the name of your bucket, in my case the full command would be:
s3cmd ws-create --ws-index=index.html --ws-error=404.html s3://website-bucket-20210807
To get the endpoint (URL) of your newly configured site, use s3cmd’s ws-info option.
s3cmd ws-info s3://[BUCKET]

Note that in the output, the endpoint contains s3-website-default.amazonaws.com. We need to change this in the config file.
Open the config file and find the website_endpoint line. Change it to the following:
website_endpoint = http://%(bucket)s.website-us-east-1.linodeobjects.com
Replacing the us-east-1 part with the region your bucket is in, in my case it would be:
website_endpoint = http://%(bucket)s.website-eu-central-1.linodeobjects.com
Run the info command again and the endpoint should have changed:

Finally, you can send the site files to the bucket. First, change into your _site directory if using Jekyll, or the root of the generated site (in Hugo’s case this would be public). Then, run the following command to sync the files to the bucket:
s3cmd --no-mime-magic --acl-public --delete-removed --delete-after sync . s3://[BUCKET]
The . specifies to send the files in the directory you are currently in.
no-mime-magicTells Object Storage not to use file signatures when guessing the object’s MIME-type.acl-publicSets the access level control of the objects to public.delete-removedDeletes any destination objects with no corresponding source file.delete-afterDeletes destination files that are no longer found at the source after all files are uploaded to the bucket.
If all goes well, you should be able to navigate to the site link provided by the s3cmd ws-info command and see your site!
Now that your site is live, you could configure DNS settings to add a CNAME record if you have a domain that you want to point to this site.
I cover DNS record creation in another tutorial for hosting a website on AWS:
https://littlebigtech.net/posts/hosting-a-website-on-aws-for-free/#creating-a-dns-record
The configuration will depend on where you have your domain name registered.
Hope you enjoyed reading and that you found this useful!