Introduction
This guide will show you how to install Wireguard VPN on your linux client (Debian based, in my case I am using Pop!_OS) so that you can access your Unraid server through a VPN from anywhere!
In order for the client to be able to connect from anywhere in the world, we will use DuckDNS as a dynamic DNS service to point to your Unraid server. Since if your Unraid server is in your home network, your public IP might change, depending on your ISP. With DuckDNS configured, you can use a subdomain that DuckDNS will automatically update with your public IP, without worrying that your public IP might change.
Setting up DuckDNS
To set up DuckDNS, first you need to go to duckdns.org to make an account and set up a subdomain.
This will give generate a token, which you will need for this next step.
Now you can install the DuckDNS container on Unraid. On the Apps tab on Unraid, search for DuckDNS.

In this picture it is already installed, instead of Actions it will say Install Then, you will get the configuration screen, where you need to fill out all the token you got from the DuckDNS site and your subdomain.

Then you can click Apply and Done at the bottom. That should be all we need to do with DuckDNS.
Adding a tunnel and peer on your Unraid server
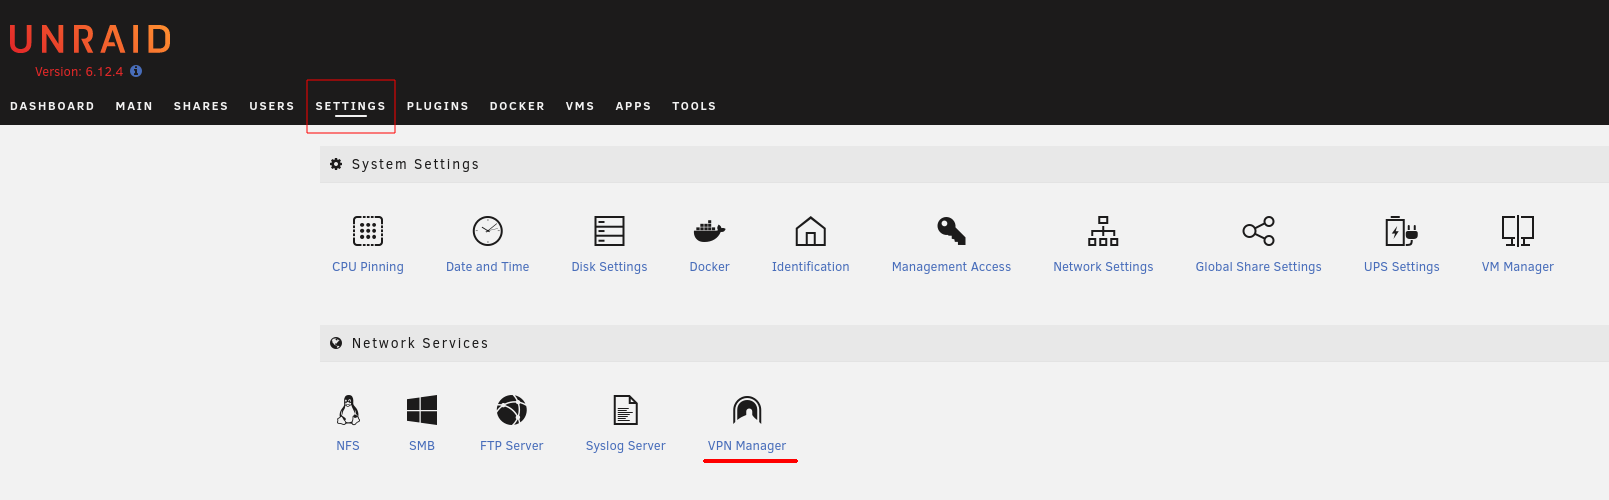
The next step would be to add or using an existing peer to the Wireguard configuration on your Unraid server. Under settings, click VPN manager.
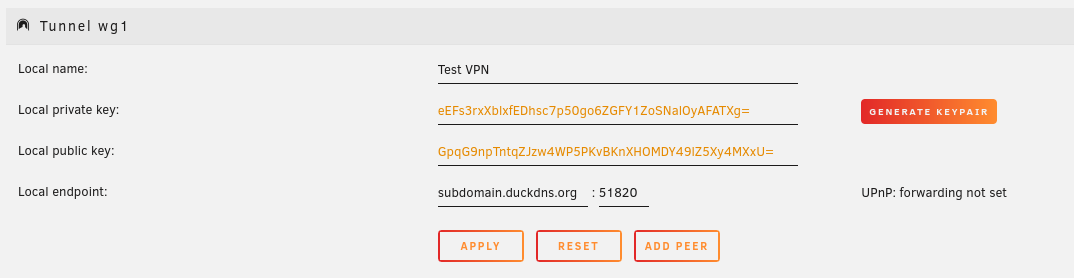
There you will see all your current Wireguard tunnel configurations and peers if you have previously created any.
Now you simply create a new tunnel. Give it a name. Click on generate keypair and also input your subdomain from DuckDNS. For the port, commonly Wireguard uses 51820.
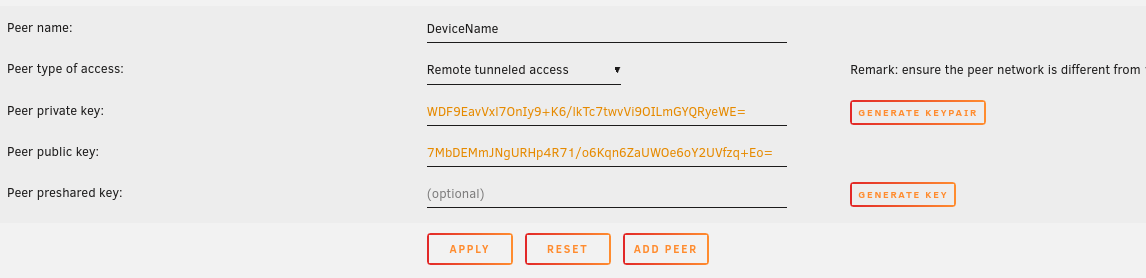
The tunnel is now configured, so all that remains here is to add a peer, which is basically a client. Similarly to how you added a tunnel, give it a name (for example “Laptop”) and click on generate keypair. For the types of access, if you want all the traffic of your client to go through the VPN, choose Remote tunneled access.
For a diagram of the other types, you can click on Peer type of access and you will get a diagram with the different types of configurations.

Port Forwarding
The part that usually causes problems! If you cannot access the port forward settings of your router then you will not be able to proceed. There are other options like [here][ngrok] that I cover more in depth in another of my articles, like the one on how to set up a minecraft server on a raspberry pi, but I will not into them here.
Essentially, you need to forward the external port 51820 to the IP address of your Unraid server on your local network on the internal port 51820. Also make the protocol UDP. On my server, it looks something like this (I blurred out the IP address of my Unraid server):

The last step that remains is to configure your client! For windows, mac and mobile it is more straightforward than linux, so I will cover the linux setup here.
Installing Wireguard on the linux client
The first step would be to update your existing packages to the latest versions. Open a terminal on your linux client and execute following command:
sudo apt update && sudo apt upgrade -y
Then to install the Wireguard client itself, execute the following:
sudo apt-get install wireguard
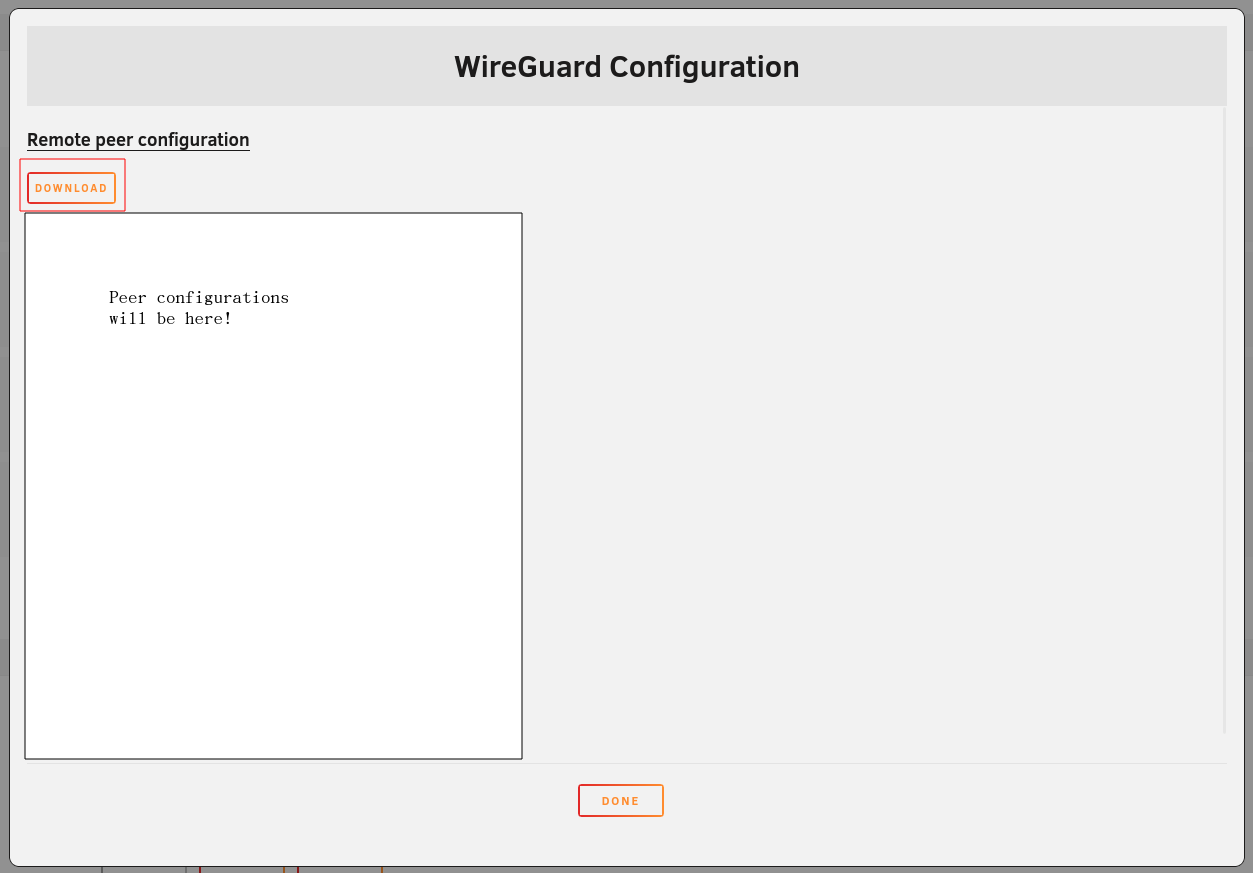
Now, you have to get the configuration for this peer from the server. This can be done in the VPN manager as shown before, and for the peer that you configured, you can click on the eye icon.
![]()
This will allow you to download the configuration.
Now you can either transfer it to your linux computer using a USB stick or some kind of file transfer if you are on different systems, but once you have the contents on the linux system, create and open a configuration file using the following:
sudo nano /etc/wireguard/wg0.conf
This will create a configuration called wg0, though you can call it whatever you like by changing the name of the file. In this file, paste the contents of the peer config you downloaded from your server. Exit nano by pressing ctrl+x followed by y and enter.
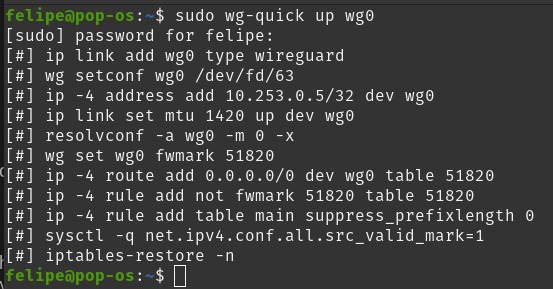
The last thing to do is enable the tunnel! Do this by typing the following ito a terminal:
sudo wg-quick up wg0
The output should look something like this:
That’s it!
Hope it was helpful! Please share this on social media if you know someone that it might help! Links below!