Introduction
This all started when I was looking to host my own Minecraft server, but I did not want to run it from my own network for a couple of reasons.
Firstly, I did not want to open ports on my router since this is always a security concern, but most importantly, I was tired of having to go through all the set up every time I wanted to set up a new server, manually updating the .jar file every time Minecraft updated, and especially having a computer running in my home, even if it was a raspberry pi, consuming power 24/7 when perhaps I only played on the server with my friends a couple of days a week. Granted, self hosting has its own benefits, and I am currently working on something using that approach which I will write about on another article.
The secret sauce of this tutorial is the fact that we are going to use docker with this docker image. Thanks to the author and the contributors to this github repository, I can use this image to set up a no frills super easy and maintainable Minecraft server. The part I like the most is that with a simple server restart, it will update the Minecraft server to run on the latest version. How neat is that!
This installation will be pretty bare-bones, but allow you to access the world and configuration files that will be configured to be outside of the docker container, so if you decide you want to delete the image and re install it, or swap it out for another one, the hassle should be minimal.
Without further ado, lets get to it!
Setup
Firstly, you will need an AWS account. It is important to note that if you want to take advantage of the free tier advantages that I will use in this tutorial, your account needs to be less than a year old and you will have to check your usage limits. The easiest way to do this is to make a new account to use for the server.
Disclaimer: When you set up an AWS account, you will be charged 1$ up front that will then be returned at a later date. Amazon does this to check that the card does indeed exist.
Once you have the account set up, we need to create an instance.
Creating the instance
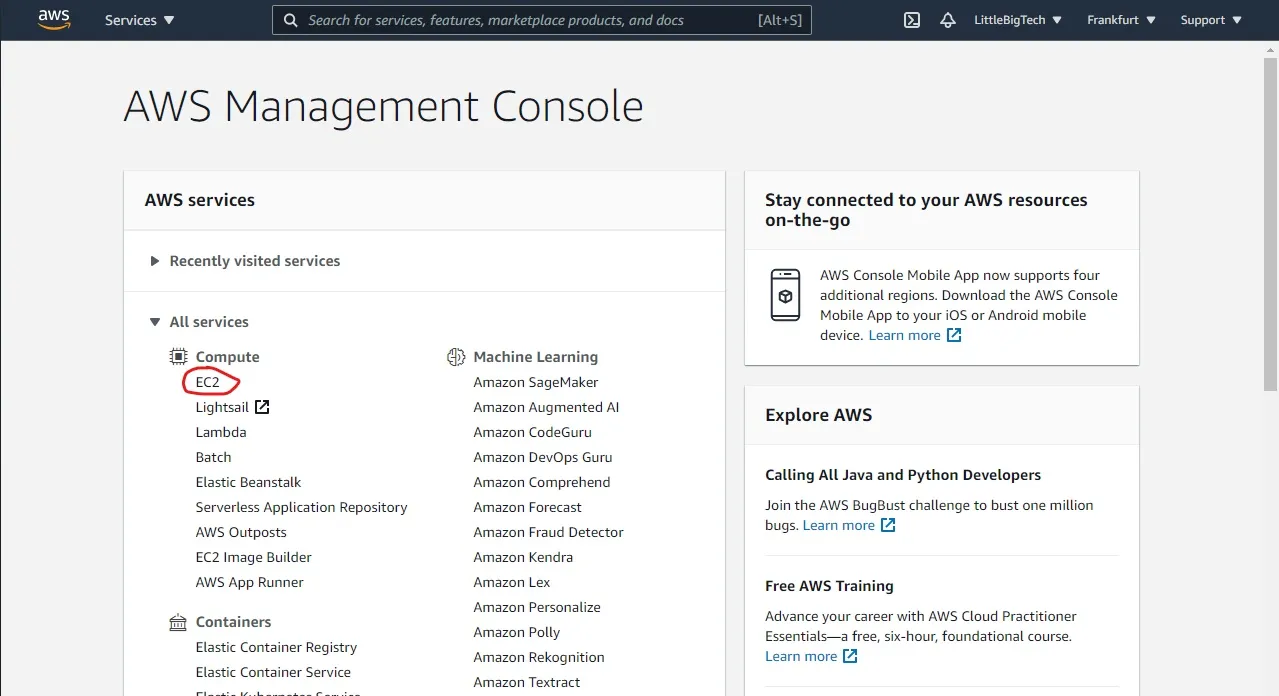
Firstly, find and click on EC2 in the AWS management console.
Then, click on launch instance.

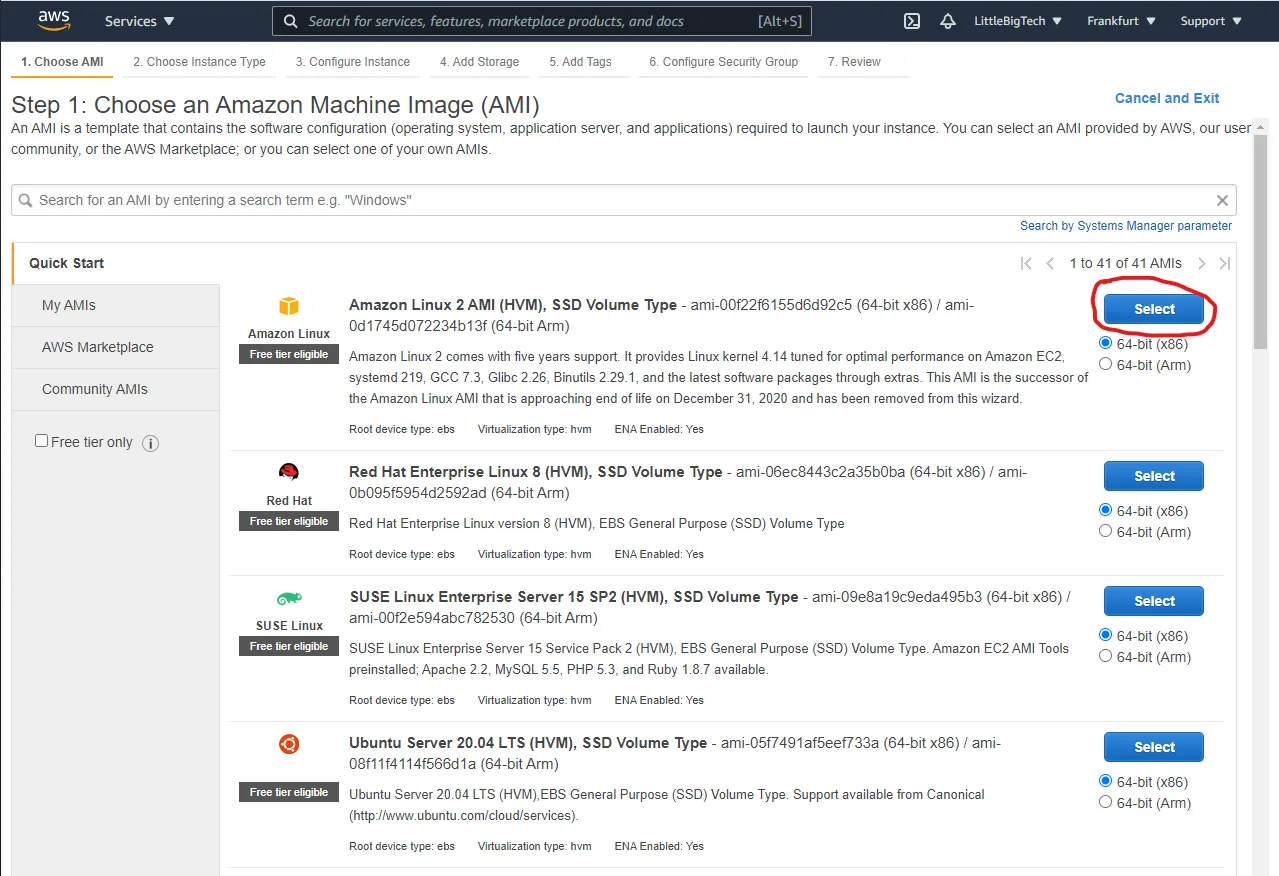
For this tutorial I used amazon linux, however most other linux distros should work. Keep in mind that some of the commands will change if you decide to go for another distro (sudo apt install vs sudo yum install for example).
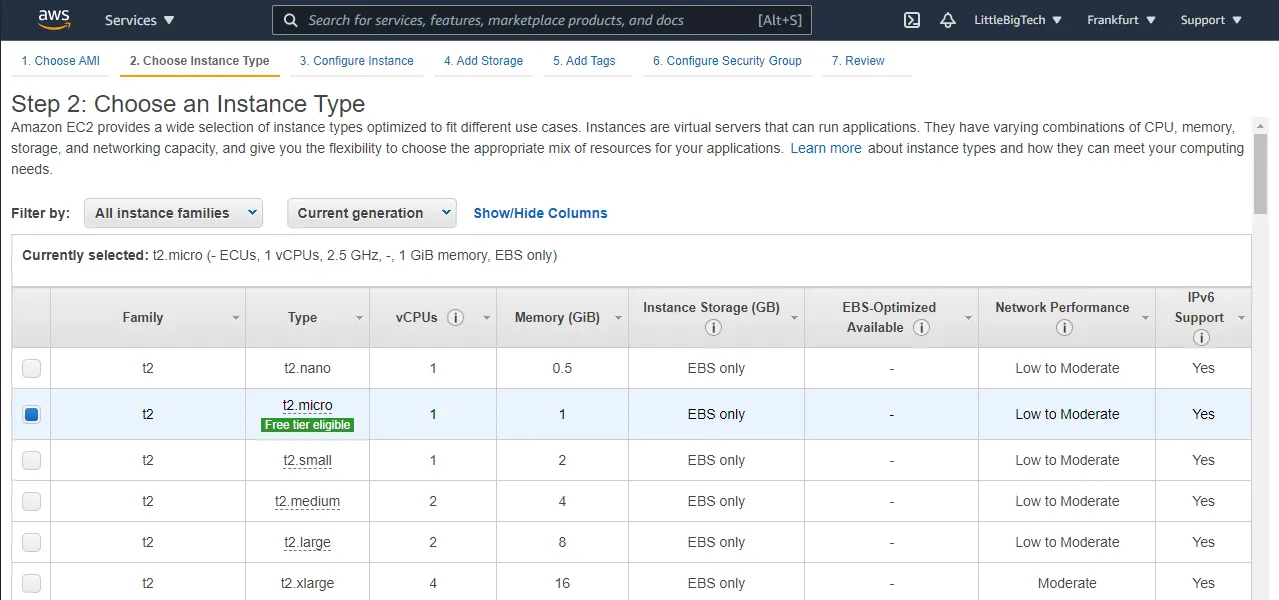
The instance type I left as t2.micro, since it is free tier eligible. Note that AWS only provides one core and one gigabyte of memory (it’s free so I won’t complain) which might not be enough if you are planning on installing plugins or mods in the future, but is plenty to host a vanilla server with 2-3 friends.
Granted, you could use any other instance type, most of the tutorial will still apply. Once selected, click review and launch on the bottom right corner. Leave the settings as they are, and ignore the security warnings, we will address them with the next step.
When prompted to select or create a key pair, select “Create a new key pair” and give it a name. I chose “minecraft-server-key”. Before you launch the instance click on “Download key pair” and keep track of its location, since you will need this to connect to the instance.
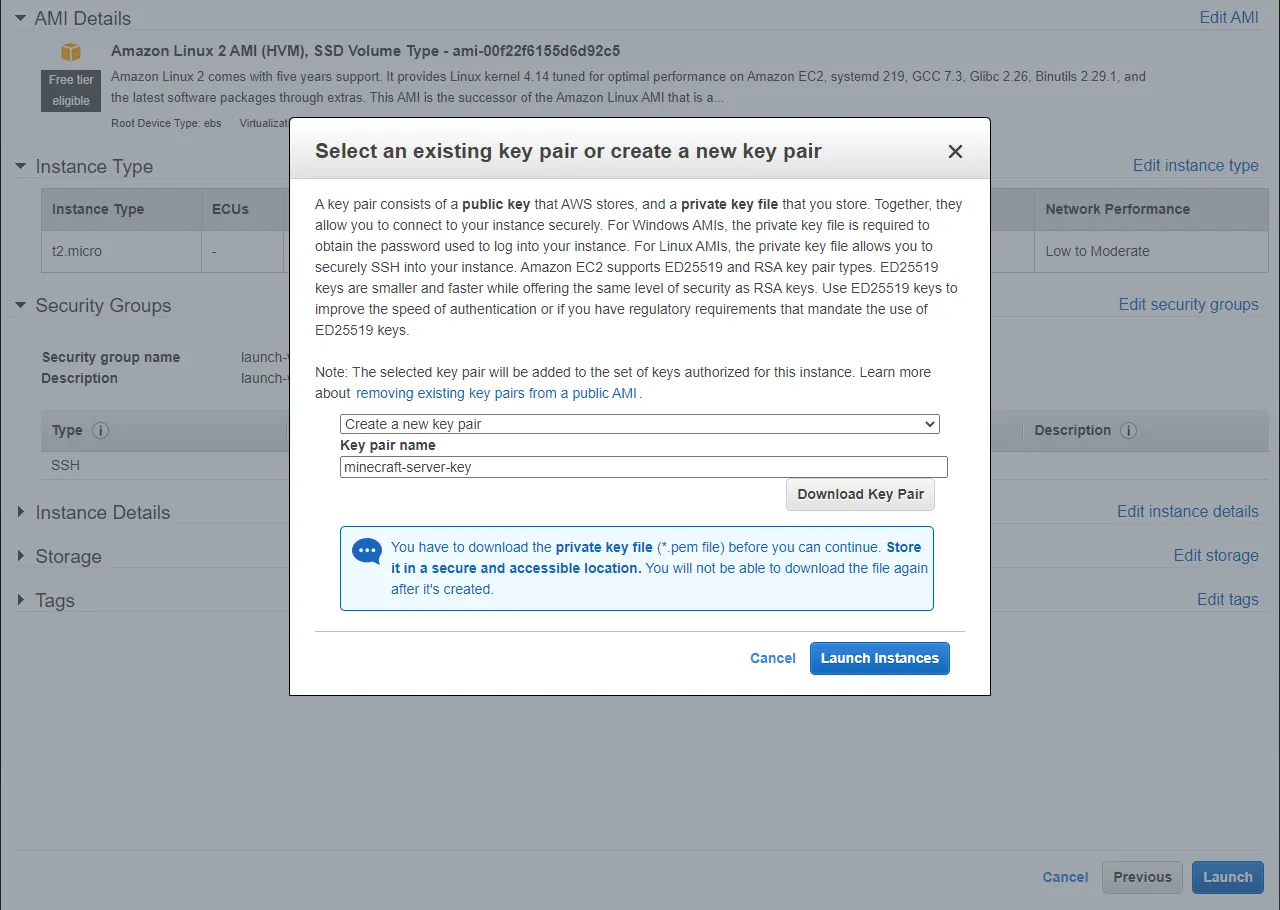
Once downloaded, select “Launch Instances” and your computer in the cloud will be up and running in a couple of minutes! Grab a cup of coffee while AWS gets it set up.
Connecting to the instance
In order to set up the server, we need to connect to the instance. Here is where that key file you downloaded before will come in handy.
Since there are many different ways to connect and different OS’s to connect from, and Amazon has already done a great job of explaining how to connect to your instance, follow the official AWS instructions on how to get connected using an SSH client here.
Once you are connected, we can start issuing commands.
Downloading dependencies and Docker
First we will update all installed packages and delete old ones with sudo yum update -y
Then reboot the instance with sudo reboot
Connect to the machine again. It sometimes takes a minute for the instance to come back up.
Install the software we will need to run this minecraft server:
sudo yum install java-1.8.0-openjdk-headless docker -yInstall docker-compose:
sudo curl -L https://github.com/docker/compose/releases/latest/download/docker-compose-$(uname -s)-$(uname -m) -o /usr/local/bin/docker-composeStart the docker service:
sudo service docker startGive your amazon user permissions to run docker commands:
sudo usermod -a -G docker ec2-userGive your amazon user permissions to run docker-compose:
sudo chmod +x /usr/local/bin/docker-composeMake docker auto-start:
sudo chkconfig docker onCreate a directory for the minecraft server and cd into it:
mkdir minecraft-server && cd minecraft-serverCreate a docker-compose.yml file:
sudo nano docker-compose.yml
To this file, add the following contents. It is important that the tabulation is actually 4 spaces:
minecraft-server:
    image: itzg/minecraft-server
    container_name: minecraft-server

    ports:
        - "25565:25565"

    environment:
        MEMORY: 512m
        EULA: "TRUE"
    tty: true
    stdin_open: true
    restart: always

    volumes:
        # attach a directory relative to the directory containing this compose file
        - ./minecraft-data:/data
Keep in mind that by doing this you are accepting the Minecraft EULA. To exit the file, hit ctlr+x followed by y and enter.
Again, thanks to the creators of this Minecraft image. If you want to see what other options and parameters you could play with, check out the github repository.
What is this docker-compose.yml file we just created? This file will tell docker how and what image to build. the first line is the name of the container, this could be anything, I chose minecraft-server so that we can easily identify it. It is also again specified in line 3. the other important parameters are the MEMORY under environment, and the volumes section.
The memory is set to half a gigabyte for a reason, since we do not want the server to consume all the RAM once started. If we left this to the default 1GB, and we started the docker container, the instance would crash (assuming you are running a t2.micro instance with 1GB of RAM). This is because the instance does not come with any pre-configured swap space.
You can read more about swap space here but essentially it involves allocating some of your disk space to be utilized as extra memory in case the system needs it. It is slower of course, but there is more of it. Since AWS instances come with SSD storage, the impact will not be that bad as if they were using HDD storage.
Therefore, before we start the server, we are going to add a swap partition.
Configuring swap space
To add and enable swapping for this instance, do the following:
- Create a 2GB swap partition:
sudo /bin/dd if=/dev/zero of=/var/swap.1 bs=1M count=2048
This command takes a while so let it do its thing. When you get the prompt looking something like this you know it is done:

Then proceed with the rest.
- Make/mark it a swap partition:
sudo /sbin/mkswap /var/swap.1 - change permissions:
sudo chmod 600 /var/swap.1 - Enable swapping:
sudo /sbin/swapon /var/swap.1
Finally, open the /etc/fstab file by typing sudo nano /etc/fstab and add the following line to the end of the file in a new line:
/var/swap.1 swap swap defaults 0 0
The file should now look something like this:

Remember to save and exit with ctrl+x followed by y and enter.
To check that the swap partition is properly set up and working, type swapon -s. The output should show the swap partition you just created.

Starting the server
Start the docker container that will run your server by typing: docker-compose up -d
Now the docker image running the Minecraft server should be starting up! if you run the ls command you should see that a directory called minecraft-data has been created, which will contain all your server config files.
That’s it! your Minecraft server is up and running. You can check whether it is done starting by using the following command: docker logs -f minecraft-server
Once you see it is done generating the world, you can use ctrl + c to stop looking at the server’s output.
Connecting to the server
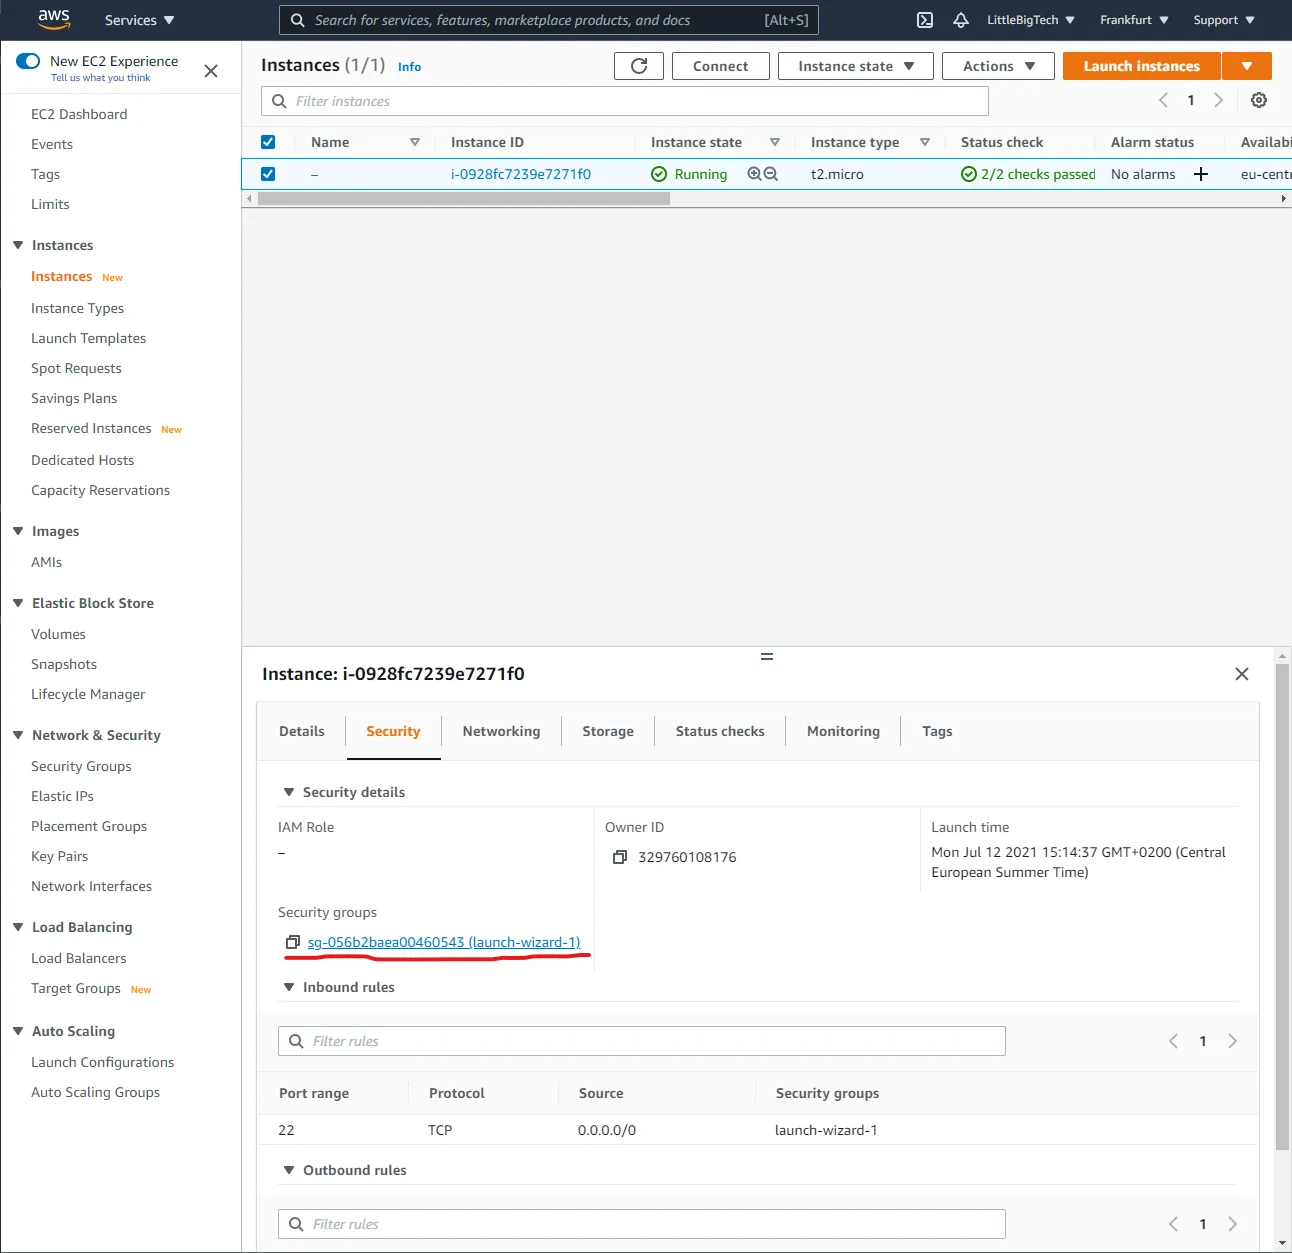
How do we connect to the server we just created? We need to add a security rule.
Select the instance and click on the security group of the instance.
Click on edit inbound rules.
Click on add rule.
Use port 25565, and in the source field simply choose the 0.0.0.0/0 option.
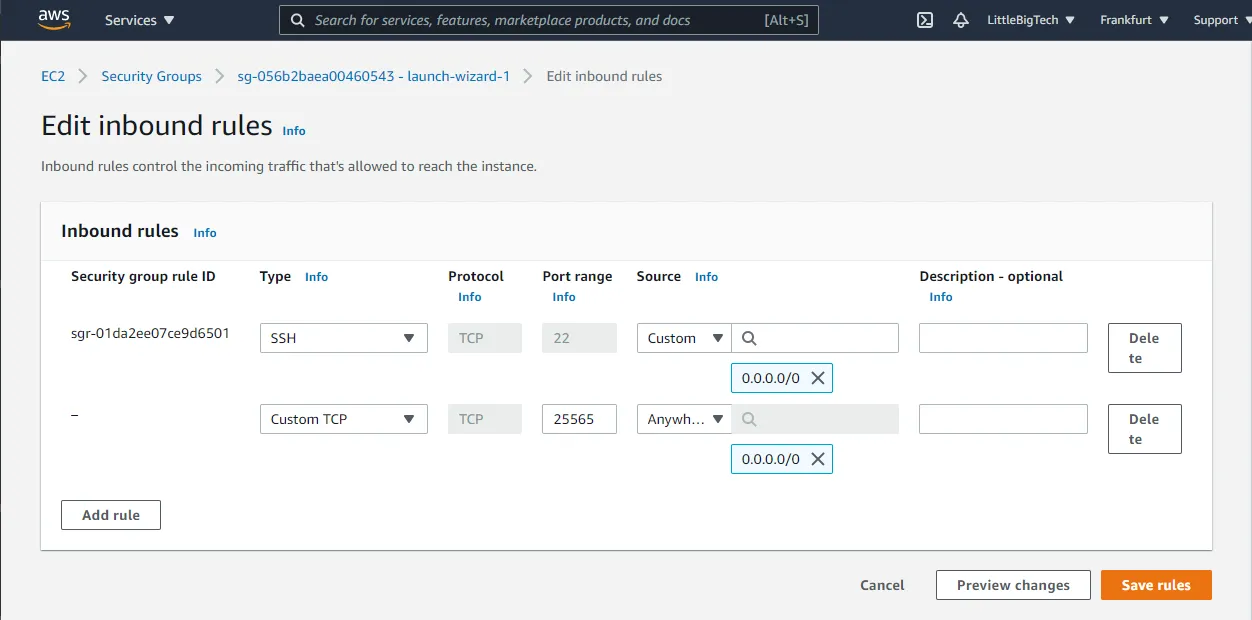
Click save rules.
Now you can connect to the server! The address of it is listed in the instance details. You can use the Public IPv4 DNS or the Public IPv4 address straight away to connect to it.
If you want to issue server commands, you can “send” them to the docker container using the following command: docker exec minecraft-server rcon-cli <command>.
This will send a command to the docker container, without you needing to attach to it.
You can of course connect to it using rcon which is enabled by default using the following command:
docker exec -i minecraft-server rcon-cli.
The documentation on github for the docker image used in this tutorial goes more in depth, and there you will also find useful commands, like how to stop and start the docker container.