Introduction

In this article I will go over the problems I encountered when trying to set up SSH key authentication to connect from my PC to the Raspberry Pi. The main issue was that, while I had generated a key and it was configured on both the host (my PC) and the server (Pi), when connecting it was still asking me for the Pi user’s password and not using the key, unless I explicitly stated the location of the key with the SSH command.
Here is where the automatic part comes in. The idea is that I should be able to simply configure the key and not need to specify it every time I am connecting. This is also useful if you want to set up key-only login for the raspberry pi/server.
The main steps of the process are:
- Generating an SSH key using ssh-keygen on the host.
- Transferring that key to the server.
- Configuring host to automatically use key.
- Enabling root login with the key and disabling password login all together for more security.
This tutorial assumes you have regular SSH access with password to your server, in my case the Raspberry Pi.
Generating an SSH key
First step is to generate the ssh key using ssh-keygen. This command can be used in linux, windows and macOS systems. On windows you will need to check that OpenSSH for Windows is installed. Microsoft themselves have a great guide on how to do it.
In a terminal/cmd window on your host, type the following to generate an SSH key:
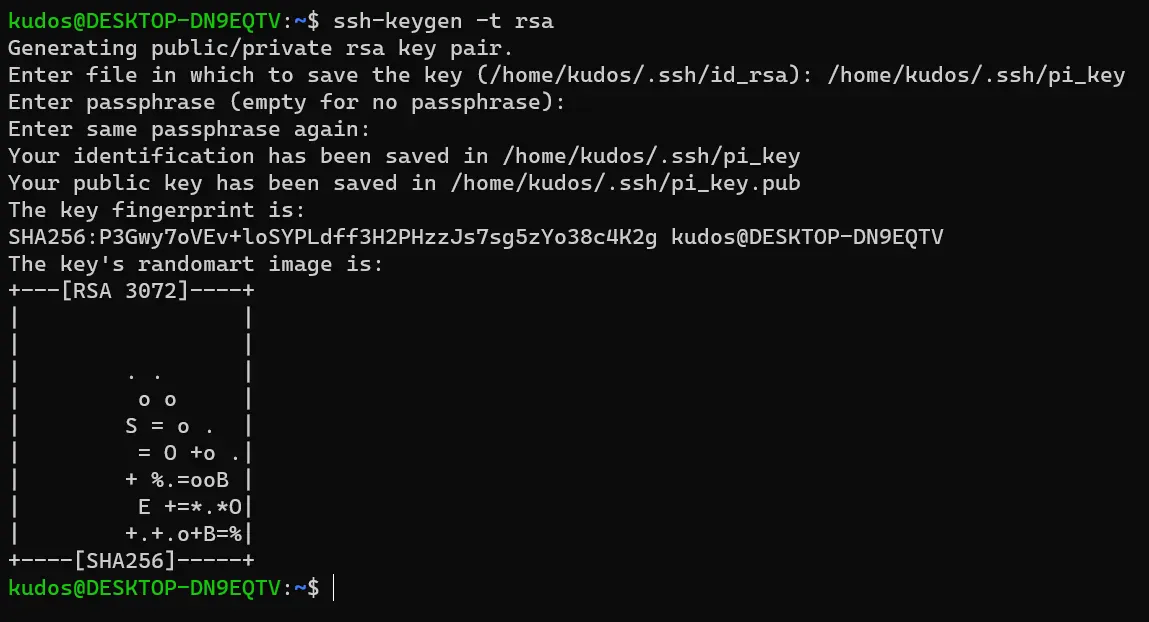
ssh-keygen -t rsa
Note that you can choose a different encryption algorithm, here I chose RSA encryption.
After that, the prompt will ask you where you want to save the key file. By default it will be the current user’s .ssh directory, with the name id_rsa. Save it wherever you like, I will leave the location the same but change the name to pi_key:

It will then ask for a passphrase. It is usually a good idea to have one for increased security, I will leave it blank for this example by hitting enter twice. The final prompt should look something like this:
Transferring that key to the server
There are 2 ways of copying the private key to the server, either manually or using the ssh-copy-id command. Using the command is usually easier than doing it manually, especially if you have normal password protected SSH access to the pi, so I will cover that here.
While still on the host/client, type the following on a terminal/cmd window:
ssh-copy-id -i path/to/key pi@server-ip
Replace path/to/key and server-ip with the path to the key you just generated and the raspberry’s IP respectively. If your server’s username is not pi like it is in this case, you need to also change pi for the server’s user you intend to log in as.
In my case it would be:
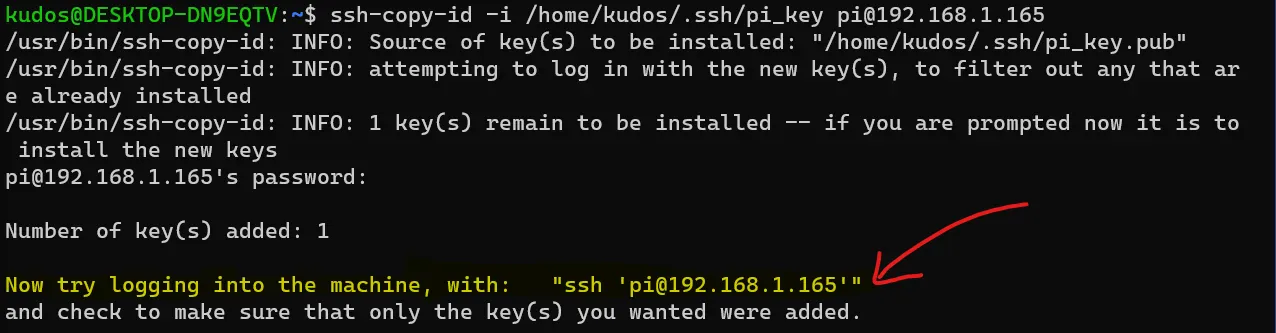
ssh-copy-id -i /home/kudos/.ssh/pi_key [email protected]
NOTE! See that I am not transferring the .pub file, I am transferring the private key. Do not transfer the public key because you won’t work. Once you have executed the command, it will prompt you for the password of the server’s user.
Great! Assuming the password was correct, the key has been transferred to the server.
Configuring host to automatically use key
In the prompt of the previous command you should see that now you are suggested to try logging in with the command provided to see if the key transfer worked:
But if I execute that:

I am still prompted for the pi user’s password! The key is not being used! Does this mean the key did not get transferred to the server? Let’s check. On the pi, execute the following command:
cat /home/pi/.ssh/authorized_keys
Which will let us know what keys the pi user accepts. Check the output:

Now compare it with the same on the host by executing the same but pointing at the PUBLIC key you just generated. In my case the command is:
cat /home/kudos/.ssh/pi_key.pub
And the output is:

They are the same! So the transfer went fine but the key isn’t being used when logging in.
Something to note here is that this would not actually happen if we had named the key the default name and saved it in the default location, but this would be very rigid since it would not allow us to create many keys for different servers. Luckily, this can all be configured by changing a config file on the host.
Configuring host to automatically use key
On the host computer, we need to modify the /etc/ssh/ssh_config file. On windows this file is C:\Users\[User]\.ssh\config. Create it if it hasn’t been created, which is most likely the case on Windows.
Open the file with either a text editor or through the command line. Since I am on a terminal I will use:
sudo nano /etc/ssh/ssh_config
An optional step is to remove the comments from the following lines:
#   IdentityFile ~/.ssh/id_rsa
#   IdentityFile ~/.ssh/id_dsa
#   IdentityFile ~/.ssh/id_ecdsa
#   IdentityFile ~/.ssh/id_ed25519
by removing the leading #. This makes sure that it does not interfere with other keys you might be using. To make sure the new key is used, add the following line anywhere in the file:
IdentityFile path/to/key
In my case it would be:
IdentityFile /home/kudos/.ssh/pi_key
If you have any other keys for other servers, you can specify their path here as well. Save and exit the file (ctrl+x followed by y and enter in my case).
Now try to connect to the pi with ssh…
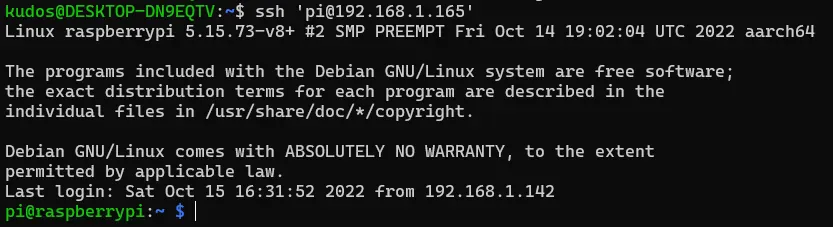
It works!
Enabling root login with the key and disabling password login
Now that the key is set up, we can configure the server (Pi) to disallow any password authentication over ssh, and only accept the usage of a key.
This can be done by modifying the /etc/ssh/sshd_config file on the Pi, find the following options and make sure they are configured as follows:
PubkeyAuthentication yes
PasswordAuthentication no
Remember to remove any leading # characters, otherwise the setting will be commented out and not be applied.
If you want to allow the root user to log in.
PermitRootLogin prohibit-password
Be advised that allowing root to log in over SSH carries its own set of risks. You can read more about the risks discussed in this stack overflow question.
Restart the ssh service with the following command to reload the configs:
sudo systemctl restart sshd
If you enabled root login with public key authentication (prohibit-password), then you will also need to copy the public key to the root user’s authorized_keys file. Again, there are 2 options to do this, with the ssh-copy-id command or manually. Since the root user on the pi does not have a password by default, the process of doing it with ssh-copy-id becomes pretty cumbersome:
- Give the root user a password
- Allow root login through SSH with password
- Copy the key
- Remove root login through SSH with password
- Remove root user password
So in this case I opt to do it manually. Remember how the pi has in its authorized_keys file the keys that are accepted? Well we need to do the same for the root user. We need to copy the key to the root user’s authorized_keys file.
The root user’s authorized_keys file is usually located at /root/.ssh/authorized_keys. Since in my case this file is empty, I make a copy of the pi user’s file:
sudo cp /home/pi/.ssh/authorized_keys /root/.ssh/authorized_keys
If you have more than one key configured for the pi user then you will need to open the file and delete the rest with this method.
Let’s check if root login works…

Great! That’s it!
Hope it was helpful! Please share this on social media if you know someone that it might help! Links below!